How to set up your building?
Setting up

Team Vizman
Last Update 4 jaar geleden
The building admin will have complete power over the building set-up and add gatekeepers after successfully registering and signing in.
If a building admin signs in for the first time, they must first set up their building, after which their gatekeeper can log in and begin checking in visitors.
The admin must complete the following procedures to set up the building:
Step 1: Building Details::You must fill in the following essential information about your building, as seen in the figure below:
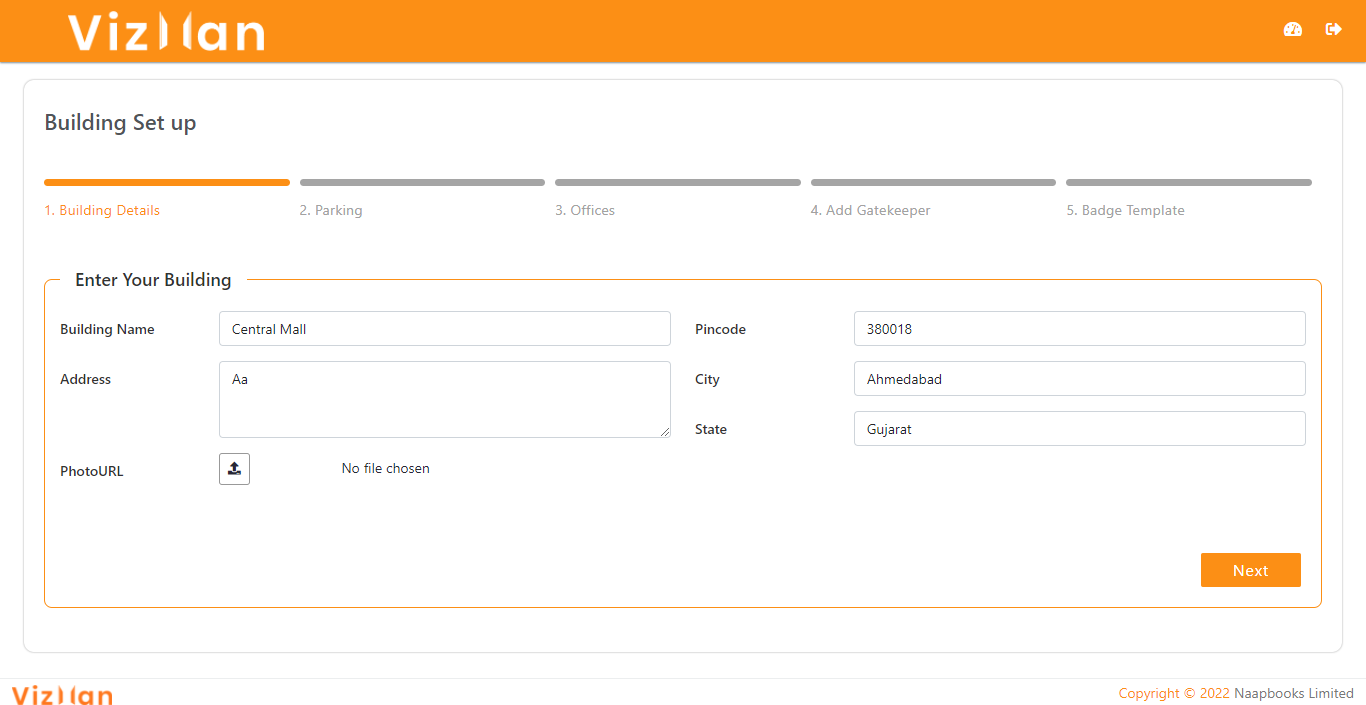
- Building name: Type the name of your building here. Special characters and alphanumeric characters are also acceptable.
- Address: Include the full address of the building. Special characters and alphanumeric characters are also acceptable.
- Pincode: A valid Pincode is required to obtain the state and city names. In addition, the Pincode must be entered. State and city names will be added automatically based on the Pincode.
- Photo URL: This is where you may upload the logo for your building. Image formats such as JPEG, JPG, and PNG are examples.
The details will be saved, once clicked on the next button.
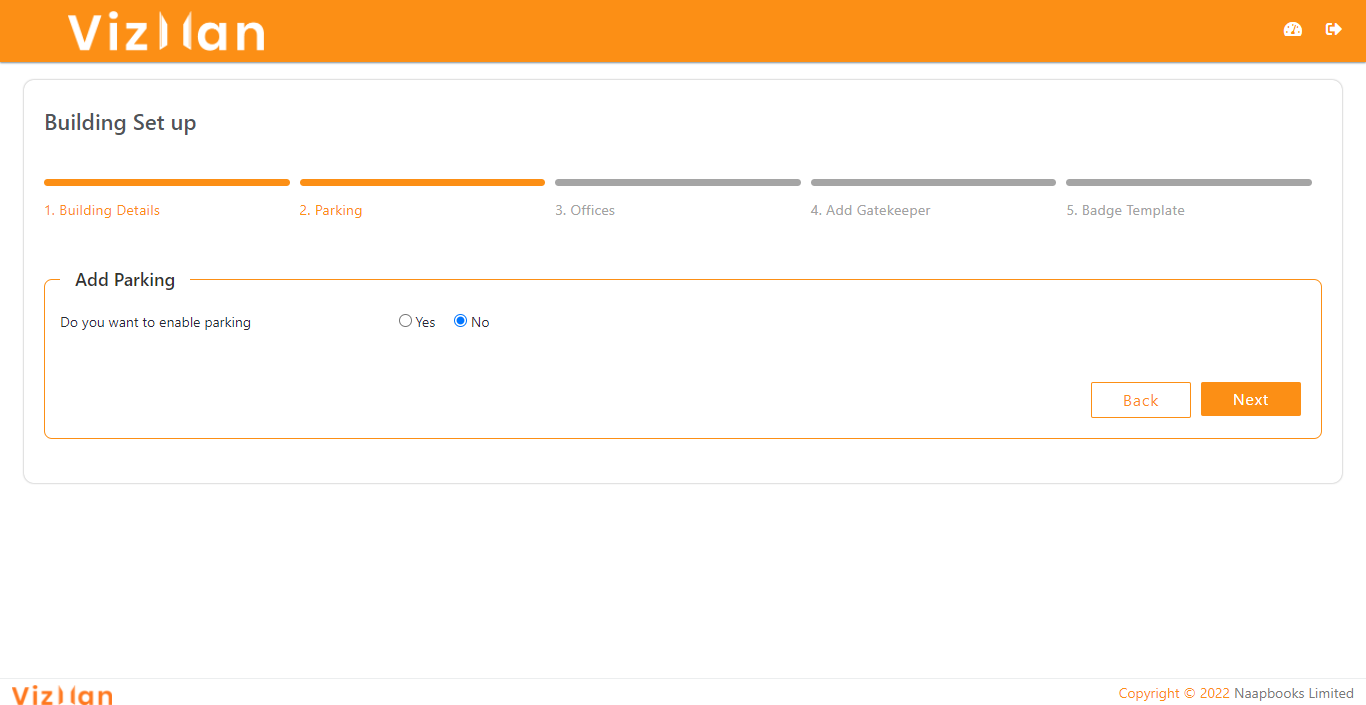
Step 1: Parking Details::The building admin must decide whether or not visitors will be able to park.
If the admin selects no parking, No more information is required for parking setup if the admin picks no parking. The information about the parking will be hidden when the gatekeeper adds any visitors.
If the admin selects that parking is available i.e. yes, the admin must fill out the remaining information.
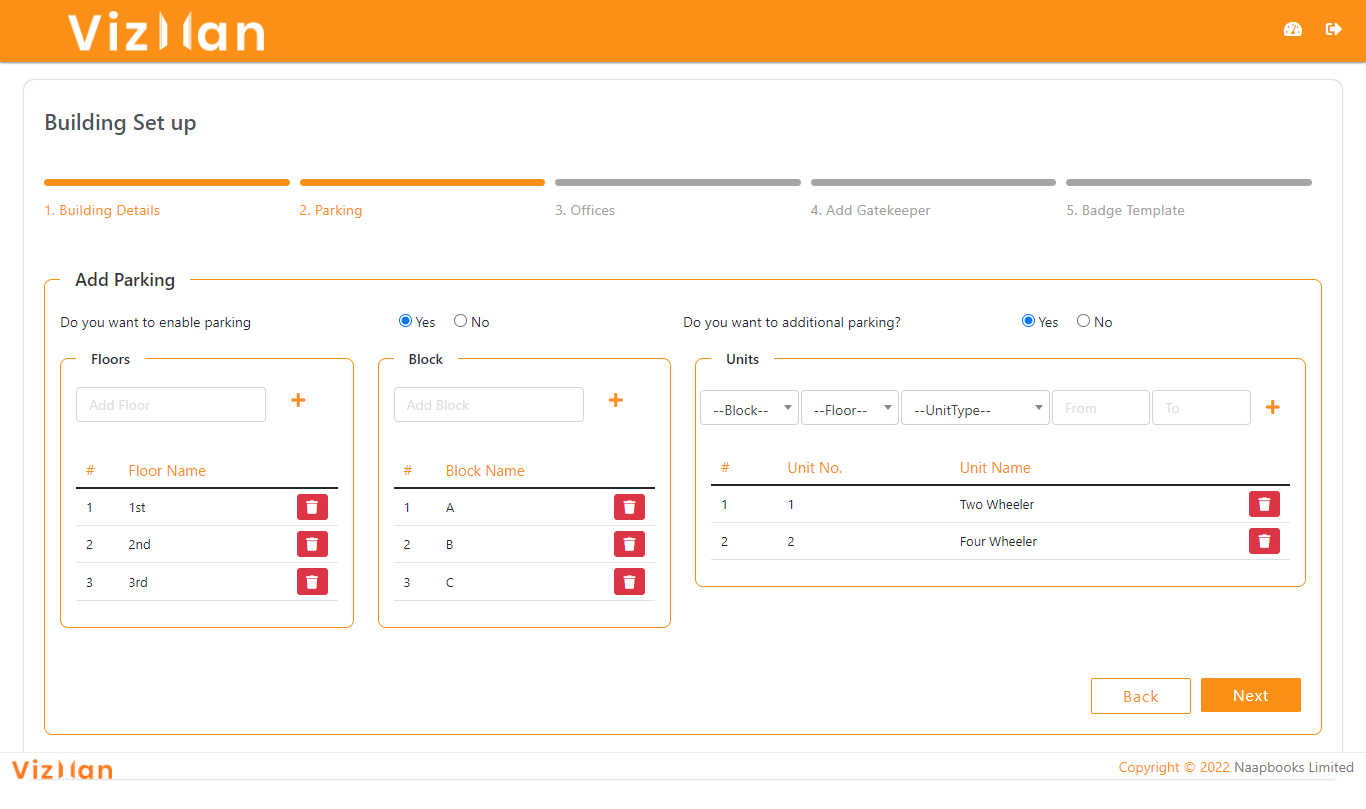
If the parking details are yes, more information will be provided.
- Floors: Add the names of available parking floors in the box, then click Add to add the floor name to the list.
- Block: Here, the admin must enter the name of blocks accessible for parking on all floors, then click Add to add the block name to the list.
- Units: In units, the admin must finish the parking setup with floors, blocks, and the maximum number of vehicles that can be parked in each block.
You must first choose the block, and then the floor on which the block is listed.
And then there is the unit type, which is the type of vehicle that can be parked in that block, whether it's a car or a two-wheeler.
‘From & To’ field: This will give the parking place a name and add up to the overall number of parking spaces for vehicles. For example, if you enter 101 in the 'From' field and 105 in the 'To' field, the total parking space will be generated from 101 to 105, resulting in 5 parking spaces being added to the list for the bock in the selected floor and packing space for that particular vehicle type will be added.
After you've filled in all of the information, click Add to add the unit's name to the list, the total parking space will be created as per from and to the field.
If the building admin wants to park the vehicles even if there are no available parking spaces, the admin must select yes in the 'Do you need additional parking?' field; if the building admin does not want to allow packing vehicles after all available parking spaces have been filled, the admin must select no.
The parking list and details will be displayed in the parking list menu on the dashboard's navigation bar.
Step 3: Office details:: Here, the building admin can list all of the offices in each block, organised by floor.
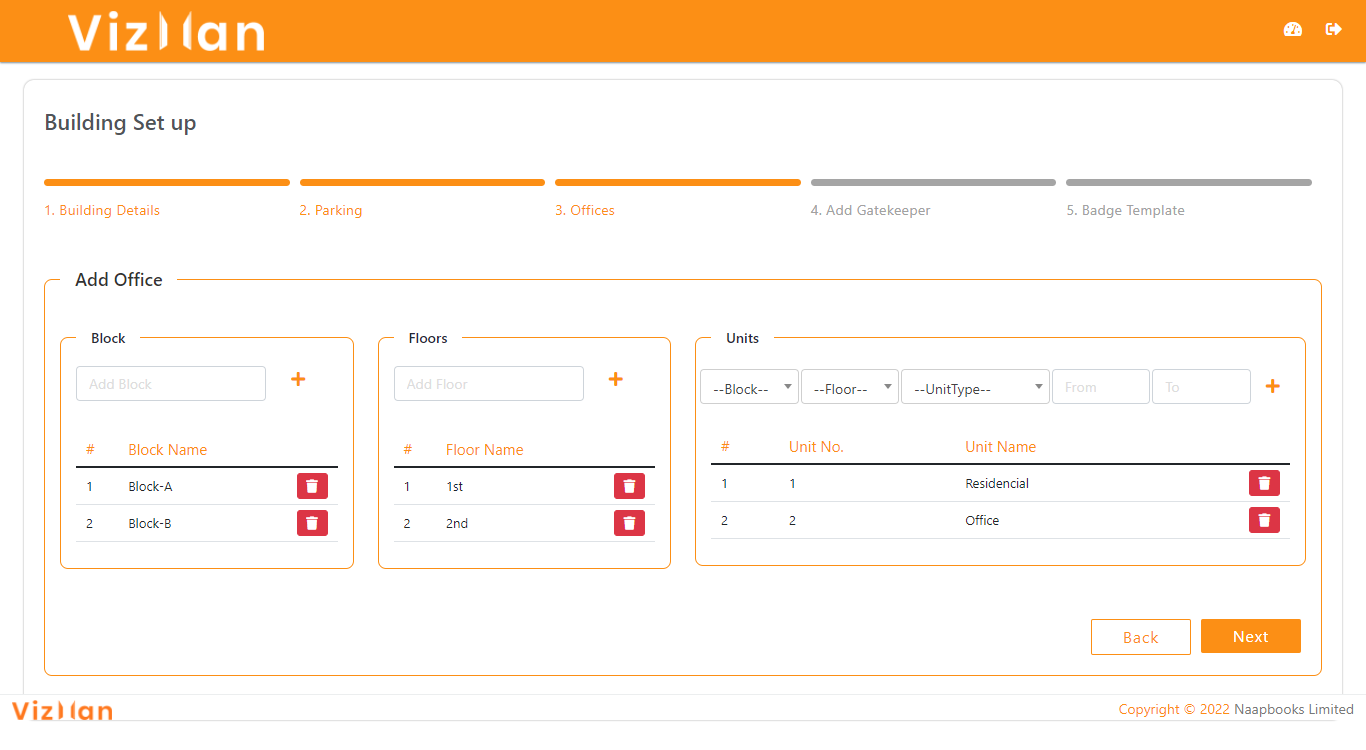
- Block: The name of the blocks available on the premises must be entered here by the admin then click on add to add the block to the list.
- Floor: the names of the different floors in each block, and click on the add to add the floor name to the list.
- Units: This will group all of the blocks according to the number of offices, residences, and shops on each floor.
To set up an office, the admin must first choose the block name, then the floor, and the sort of units on that floor as it is a residence, office or it is shop. Then, from the field "from & to," give numbers to the office.
‘From & To’ field: This will give the office place a name and add up to the overall number of offices on the floor. For example, if you enter 101 in the 'From' field and 105 in the 'To' field, the total office will be generated from 101 to 105, resulting in 5 offices being added to the list for the bock on the selected floor.
After you've filled in all of the information, click Add to add the unit's name to the list, and the office will be created as per the ‘from and to’ field.
The office list and details will be displayed in the office list menu on the dashboard's navigation bar.
Step 4: Add Gatekeeper:: From this page, you may add your gatekeeper, and after you've completed your setup, all of them will appear in the gatekeeper list.
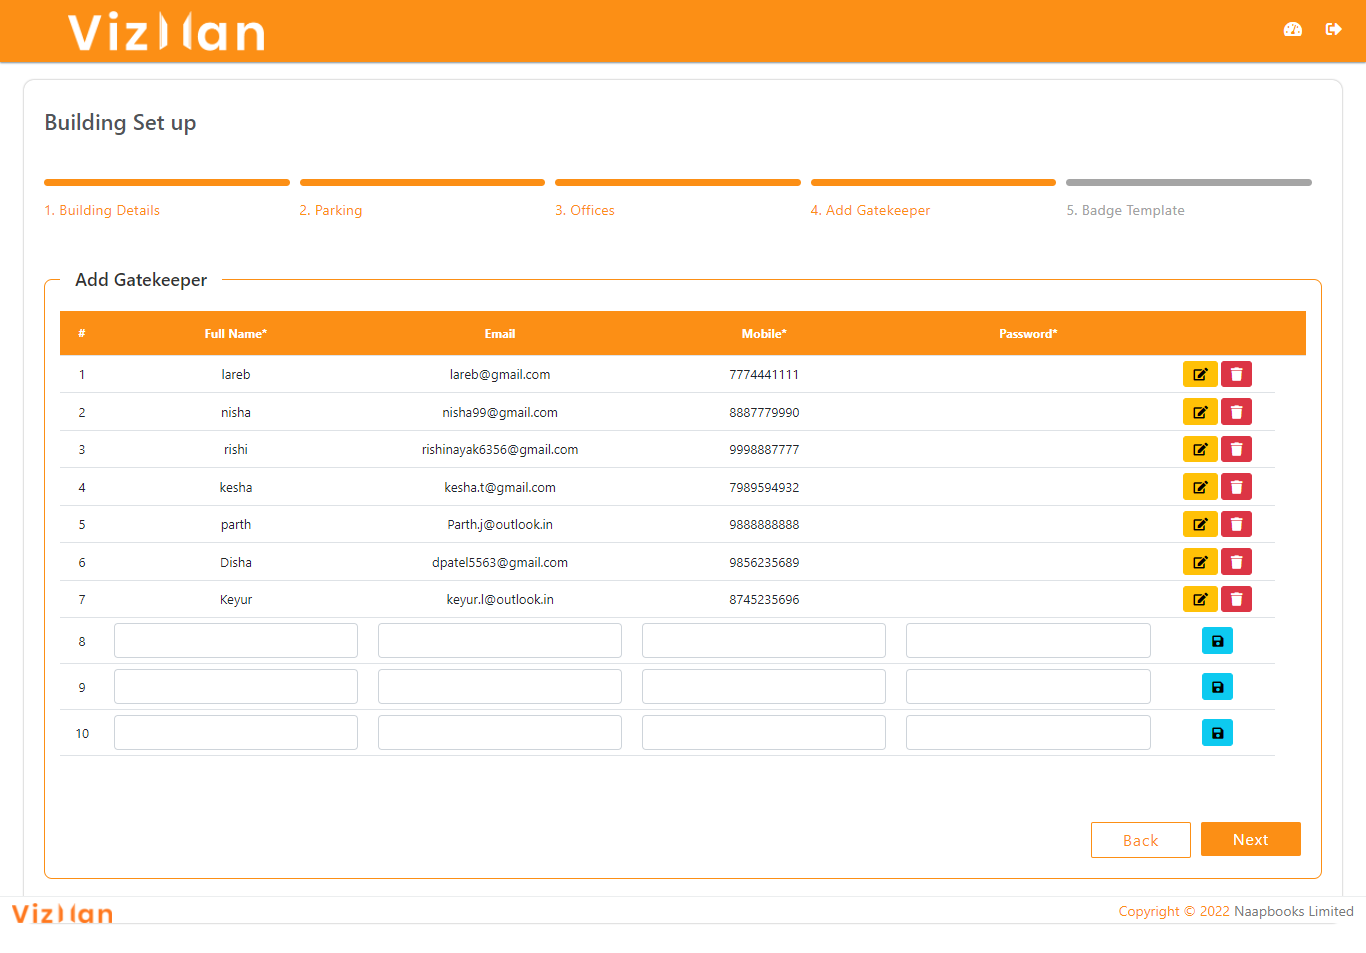
To add a gatekeeper, fill in the following information:
- Name: This is a compulsory field where you must provide the gatekeeper’s name.
- Email: Here you can input the gatekeeper’s valid email address.
- Mobile: This is essential to enter the gatekeeper’s mobile number, and it should not be entered in any other firm. If it's already in use by another company, a popup will appear asking you to add an employee, which will remove the employee from the prior company and add them to yours.
- Password: You must write the password for each gatekeeper; however, the password is hidden, and gatekeepers can sign in using their mobile number and password.
- Save: You must save each gatekeeper separately. After saving, the edit and delete buttons will show, as well as an error message if there was a problem while adding details.
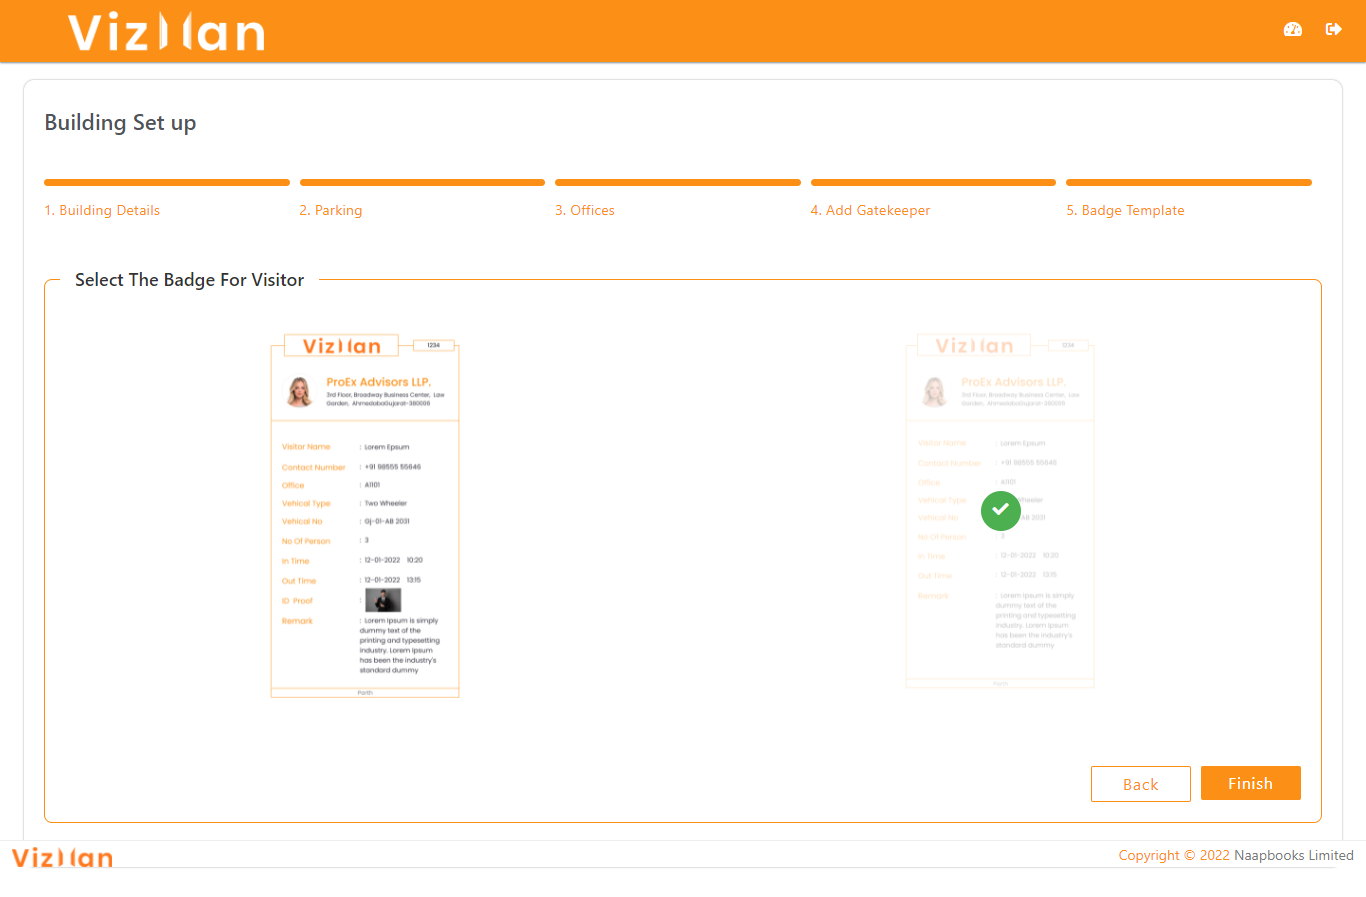
Step 5: Badge Template:This option allows you to choose a badge template for the gate pass of a visitor. You can choose from two different templates, and the visitors' gate passes will be printed according to the template you choose.
After you've completed your setup and are ready to use VizMan, you can move on to the next step. After you've finished, you'll be able to see the dashboard and some other choices. The settings option will display all of the setup menus, which you can alter at any moment.